Showing posts with label vs2012. Show all posts

July 14, 2014

Using a VMware Android emulator in Visual Studio

This is not a "manual" on how to create a VMware android virtual machine!
This is just a hint on how to use a virtual andoid in your Visual Studio environment... I'm not going to explain how to create the android vmware, just how to "connect" to it...
For android x86 install instructions, please goto the xmodulo site.


My problem


I'm using Xamarin to create mobile applications. When you install the development tools for your Visual Studio instance, it installs (among many other things) the "AVD Manager"
This "Android Virtual Device Manager" allows you to create virtual android devices to test your applications. In theory this is a nice feature. You don't need an android device to test your app... In practice however it sucks...
The virtual androids are extremely slow and -more of a problem- have maximum available memory issues when emulated in a windows environment.


problem solved?


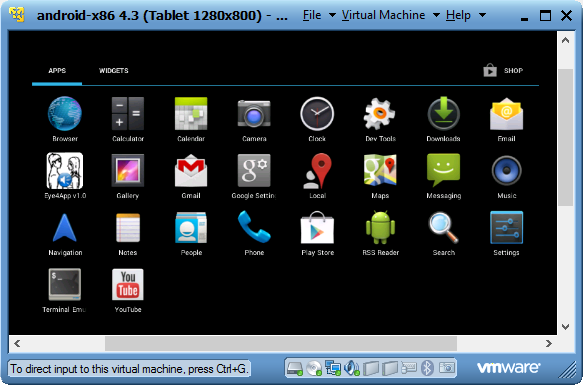
The first step was to download a x86 android ISO and create a android virtual machine.

This is a relatively easy excercise.

There was a little caveat with the network adapter. It should be changed to "vlance" before the first start of the virtual machine, but other then that it was easy enough.

The virtual android was up and running within 30 min. including downloading the ISO.
However... as always this was too easy... For good reasons -which I will not elaborate on- my development environment is also running in a virtual machine! How did I connect the virtual android to the Visual Studio enviroment in another virtual machine?


Problem solved!


Turns out it's just a small trick...
When Visual Studio starts (with Xamarin installed)  it searches for local(!) available android devices. To connect to the (remote) android virtual machine you should open the adb command prompt:

ADB command prompt


At the command prompt you connect to your virtual android using the command:
adb connect 192.168.1.110
Where 192.168.1.110 is the ip-adress of my android emulator. (The IP will probably be different in your environment ;-) You can check if you successfully connected using
adb devices
If you are connected, it should list the vm in the devices list.

You can find the android emulator ip by running the android console with ALT-F1**, then run netcfg to get the ip address. With ALT-F7** you return to the android GUI.. 

If all turned out okay, your vmware device should be listed in your available devices for debugging:
VMware, virtual android device
  
** NOTE: In my android (4.3) ALT-F1/F7 switched console/gui, however I've read CTRL-F1/F7 might do the trick in different x86 ISO's/versions.


Hints and tips...


The vmware emulator is certainly not a perfect solution, but it is a lot faster than the standard java SDK emulators. And if you're not using all kinds of sensory input it's a real alternative!
When your unable to connect, check firewall settings. An android adb connection typically connects on port 5555. Make sure it's not blocked.
In your android emulator you might need to set your netwok configuration to make this all work (see the batch file below)

You can very easily change your device screen size on the android emulation. Open the console (ALT-F1) and set your desired resolution:
wm size 1280x800

I've create a batch file to connect to my emulator(s). The batchfile has a dependence on Visual Studio Environment variables. It's located in the vs folder
C:\Program Files (x86)\Microsoft Visual Studio 12.0\VC

The shortcut on the desktop uses the %comspec% variable:
%comspec% /c ""C:\Program Files (x86)\Microsoft Visual Studio 12.0\VC\connectvmwaredroid.bat""

If I did not include the envronment variables, the connection got lost when Visual Studio starts up? It -most likely- resets the adb..

 @ECHO OFF  
 ECHO ==================================================================  
 ECHO In the android vmware: press ALT+F1 to open console  
 ECHO Then enter netcfg to find the emulator IP  
 ECHO If eth0 is not UP then enter (in the android emulator console):  
 ECHO netcfg eth0 up  
 ECHO netcfg setprop net.dsn1 8.8.8.8  
 ECHO ALT-F7 to close the console  
 ECHO ==================================================================  
 ECHO - set dev environment settings...  
 if not exist "%~dp0bin\x86_amd64\vcvarsx86_amd64.bat" goto missing  
 call "%~dp0bin\x86_amd64\vcvarsx86_amd64.bat"  
 cd %LocalAppData%\Android\android-sdk\platform-tools  
 ECHO - disconnect all devices...  
 adb kill-server  
 SET /P emu_ip=Enter the emulator ip:   
 :connect  
 ECHO - Connecting emulator...  
 rem ping %emu_ip%  
 adb connect %emu_ip%  
 adb devices  
 SET /P emu_ip=Next emulator ip (x to exit):   
 IF "%emu_ip%" == "x" goto done  
 goto connect  
 :missing  
 ECO Could not set environment variables. Connection to emulator failed...  
 :done  

Hope this post was helpfull to anyone :-)


April 12, 2013

Installshield 2012 Spring LE: SQL CE (Compact Edition) 4.0 Prerequisite

Recently I've did a complete reinstall of my laptop because of an upgrade to MS Windows 8. (Whether that's the first mistake in this story is entirely your opinion *grin*). After that MS SQL Server 2012 (Express), followed by Visual Studio 2012. All shiny and new as a figure of speech...

My problem


Next: import a Visual Studio 2010 solution into my new (and still shiny) Visual Studio 2012. It was a standard winforms app. One tiny (easily solvable) problem occurred: The solution contained a SQL CE  database, version 3.5. On my shiny new Win8 system SQL CE 4.0 was installed, either by windows itself, visual studio or SQL server 2012? (Who knows, who cares?) So I updated the references in my project to the new SQL CE objects and sure enough it compiled and ran smoothly.

Visual Studio 2012 doesn't support the 2010 Visual Studio Installer projects. This forced me to create a new Setup and Deployment project in Flexera's Installshield 2012 Spring Limited Edition. And here problems started to rise...

Prerequisite troubles...


To start with: The "Light Edition" is severely crippled (imho). It's really the absolute minimum which enables you to create a setup file, but there's very little room to tailor it. I guess they (flexera) think by doing so we're forced to buy the full version?!?!
Back to the problem: You can add prerequisites to the installer, this is the good news. The bad news however: there is no SQL CE 4.0 prerequisite to be found anywhere!!!!
Now what?

Problem solved


To shorten the story (I assume you're not interested in my frustration leading to the solution) I've figured out how to create a custom prerequisite to install SQL CE 4.0 with my application installer.


Install Shield 2012 LE - Prerequisites...

Step 1 

Download the SQL Server Compact redistributables from the Microsoft Download Center at http://www.microsoft.com/en-us/download/details.aspx?id=30709.
  • SSCERuntime_x86-ENU.exe
  • SSCERuntime_x64-ENU.exe
SQL Server Compact 4.0 is freely redistributable under a redistribution license agreement. You need to download both installers (x86 and x64)

Step 2

Create the prerequisite files for Installshield. First of all a big thank you for posting the most important part of the solution on Stack Overflow by Enzero This helped me big time.
With version 3.5 of CE there was a single installer for both x86 and x64. With 4.0 there are two separate installers. This is where I needed to tweak Enzero's solution. A check if my app is installed on a 32 or 64 bit OS.

So the "tinkered" scripts are now:

Microsoft SQL CE 4.0 SP1 (x86).prq

 <?xml version="1.0" encoding="utf-8"?>  
 <SetupPrereq>  
      <conditions>  
           <condition Type="4" Comparison="2" Path="[ProgramFilesFolder]\Microsoft SQL Server Compact Edition\v4.0" FileName="sqlceca40.dll" ReturnValue="" Bits="2"/>  
      </conditions>  
      <operatingsystemconditions>  
            <operatingsystemcondition Bits="1"></operatingsystemcondition>  
       </operatingsystemconditions>  
      <files>  
           <file LocalFile="&lt;ISProductFolder&gt;\SetupPrerequisites\SQL CE 4.0 SP1\SSCERuntime_x86-ENU.exe" URL="http://download.microsoft.com/download/F/F/D/FFDF76E3-9E55-41DA-A750-1798B971936C/ENU/SSCERuntime_x86-ENU.exe" FileSize="0,0" />  
      </files>  
      <execute file="SSCERuntime_x86-ENU.exe" cmdline="/i /passive" cmdlinesilent="/i /passive" />  
      <properties Id="{05DCCDB5-57E0-4314-A016-874F228A8FAD}" Description="This prerequisite installs the Microsoft SQL Server Compact 4.0 SP1. (x86 32bit edition)"/>  
 </SetupPrereq>  

Microsoft SQL CE 4.0 SP1 (x64).prq
 <?xml version="1.0" encoding="utf-8"?>  
 <SetupPrereq>  
      <conditions>  
           <condition Type="4" Comparison="2" Path="[ProgramFilesFolder]\Microsoft SQL Server Compact Edition\v4.0" FileName="sqlceca40.dll" ReturnValue="" Bits="2"/>  
      </conditions>  
      <operatingsystemconditions>  
            <operatingsystemcondition Bits="4"></operatingsystemcondition>  
       </operatingsystemconditions>   
      <files>  
           <file LocalFile="&lt;ISProductFolder&gt;\SetupPrerequisites\SQL CE 4.0 SP1\SSCERuntime_x64-ENU.exe" URL="http://download.microsoft.com/download/F/F/D/FFDF76E3-9E55-41DA-A750-1798B971936C/ENU/SSCERuntime_x64-ENU.exe" FileSize="0,0"/>  
      </files>  
      <execute file="SSCERuntime_x64-ENU.exe" cmdline="/i /passive" cmdlinesilent="/i /passive" />  
      <properties Id="{05DCCDB5-57E0-4314-A016-874F228A8FAD}" Description="This prerequisite installs the Microsoft SQL Server Compact 4.0 SP1. (x64 64bit edition)"/>  
 </SetupPrereq>  

Step 3

To make this voodoo all come to life we need one last step. When Installshield Spring LE was default installed the prerequisite folder should be located here:
C:\Program Files (x86)\InstallShield\2012SpringLE\SetupPrerequisites
At this location create 2 ".prq" files (with any text editor -notepad will do-):
  • Microsoft SQL CE 4.0 SP1 (x86).prq
  • Microsoft SQL CE 4.0 SP1 (x64).prq
Paste the XML from above in the created files. The x86 content in the x86 file and the x64 content in the x64 file. Make sure the extension of the files is ".prq" (especially when using notepad!)

In this folder you also need to create a new subfolder: SQL CE 4.0 SP1
In this "SQL CE 4.0 SP1"-folder you mustcopy the two downloaded redistributable files from Microsoft: SSCERuntime_x86-ENU.exe & SSCERuntime_x64-ENU.exe

Watch carefully when adding the folder with redistributable files. The naming is used in both .prq XML content.

That's it!
Now, when you look at the redistributables in your Visual Studio setup project, you should see the x86 and x64 SQL CE 4.0 prerequisites. If you're not sure if your app is going to be installed on a x86 Windows OS or an x64. just add both! The "<operatingsystemconditions>" part in the XML checks if the prerequisite should be installed based on the architecture.

Keep in mind...


Though this "trick" does work and does install SQL CE 4.0 with your applications setup, beware this is not an official prerequisite! I don't think it's illegal either ("freely redistributable under a redistribution license agreement")
Other then this, you're good.

It took me a few free evenings to figure this one out. I hope you find this info useful and it didn't took you that long for you to find my blog entry :o)